So, my LED flagpole turned out so well, I’ve decided to see if others would like one as well. I’ll try a limited run and see if it’s practical to produce for sale to my fellow ‘bent riders.
GREAT NEWS! I have completed a batch of Pixel Poles and am ready to sell them. They will be available in my Tindie store in a matter of days. What is Tindie? It’s a place for makers to sell their crafts. Everything you’ll find there is tech stuff and the site handles the transactions and keeps things safe. Kind of like Etsy for Geeks. Click the badge below to go to my store.

If you didn’t see my post with the original project, you can read it here. Since that post, I have found a number of ways to improve the light. A small plastic enclosure perfect for the project has been sourced. A good power cable that matches the waterproof connector on the battery pack has been obtained. Several electronic miniature components that will keep the size small are also sourced and enough ordered for prototypes to be made. The layout will initially be on prototype board, but if enough will be made, I have a PC board layout and will order boards. I have also obtained a narrower type of LED strip that matches the size of a bike flag pole better. With each iteration of this project, it gets better.
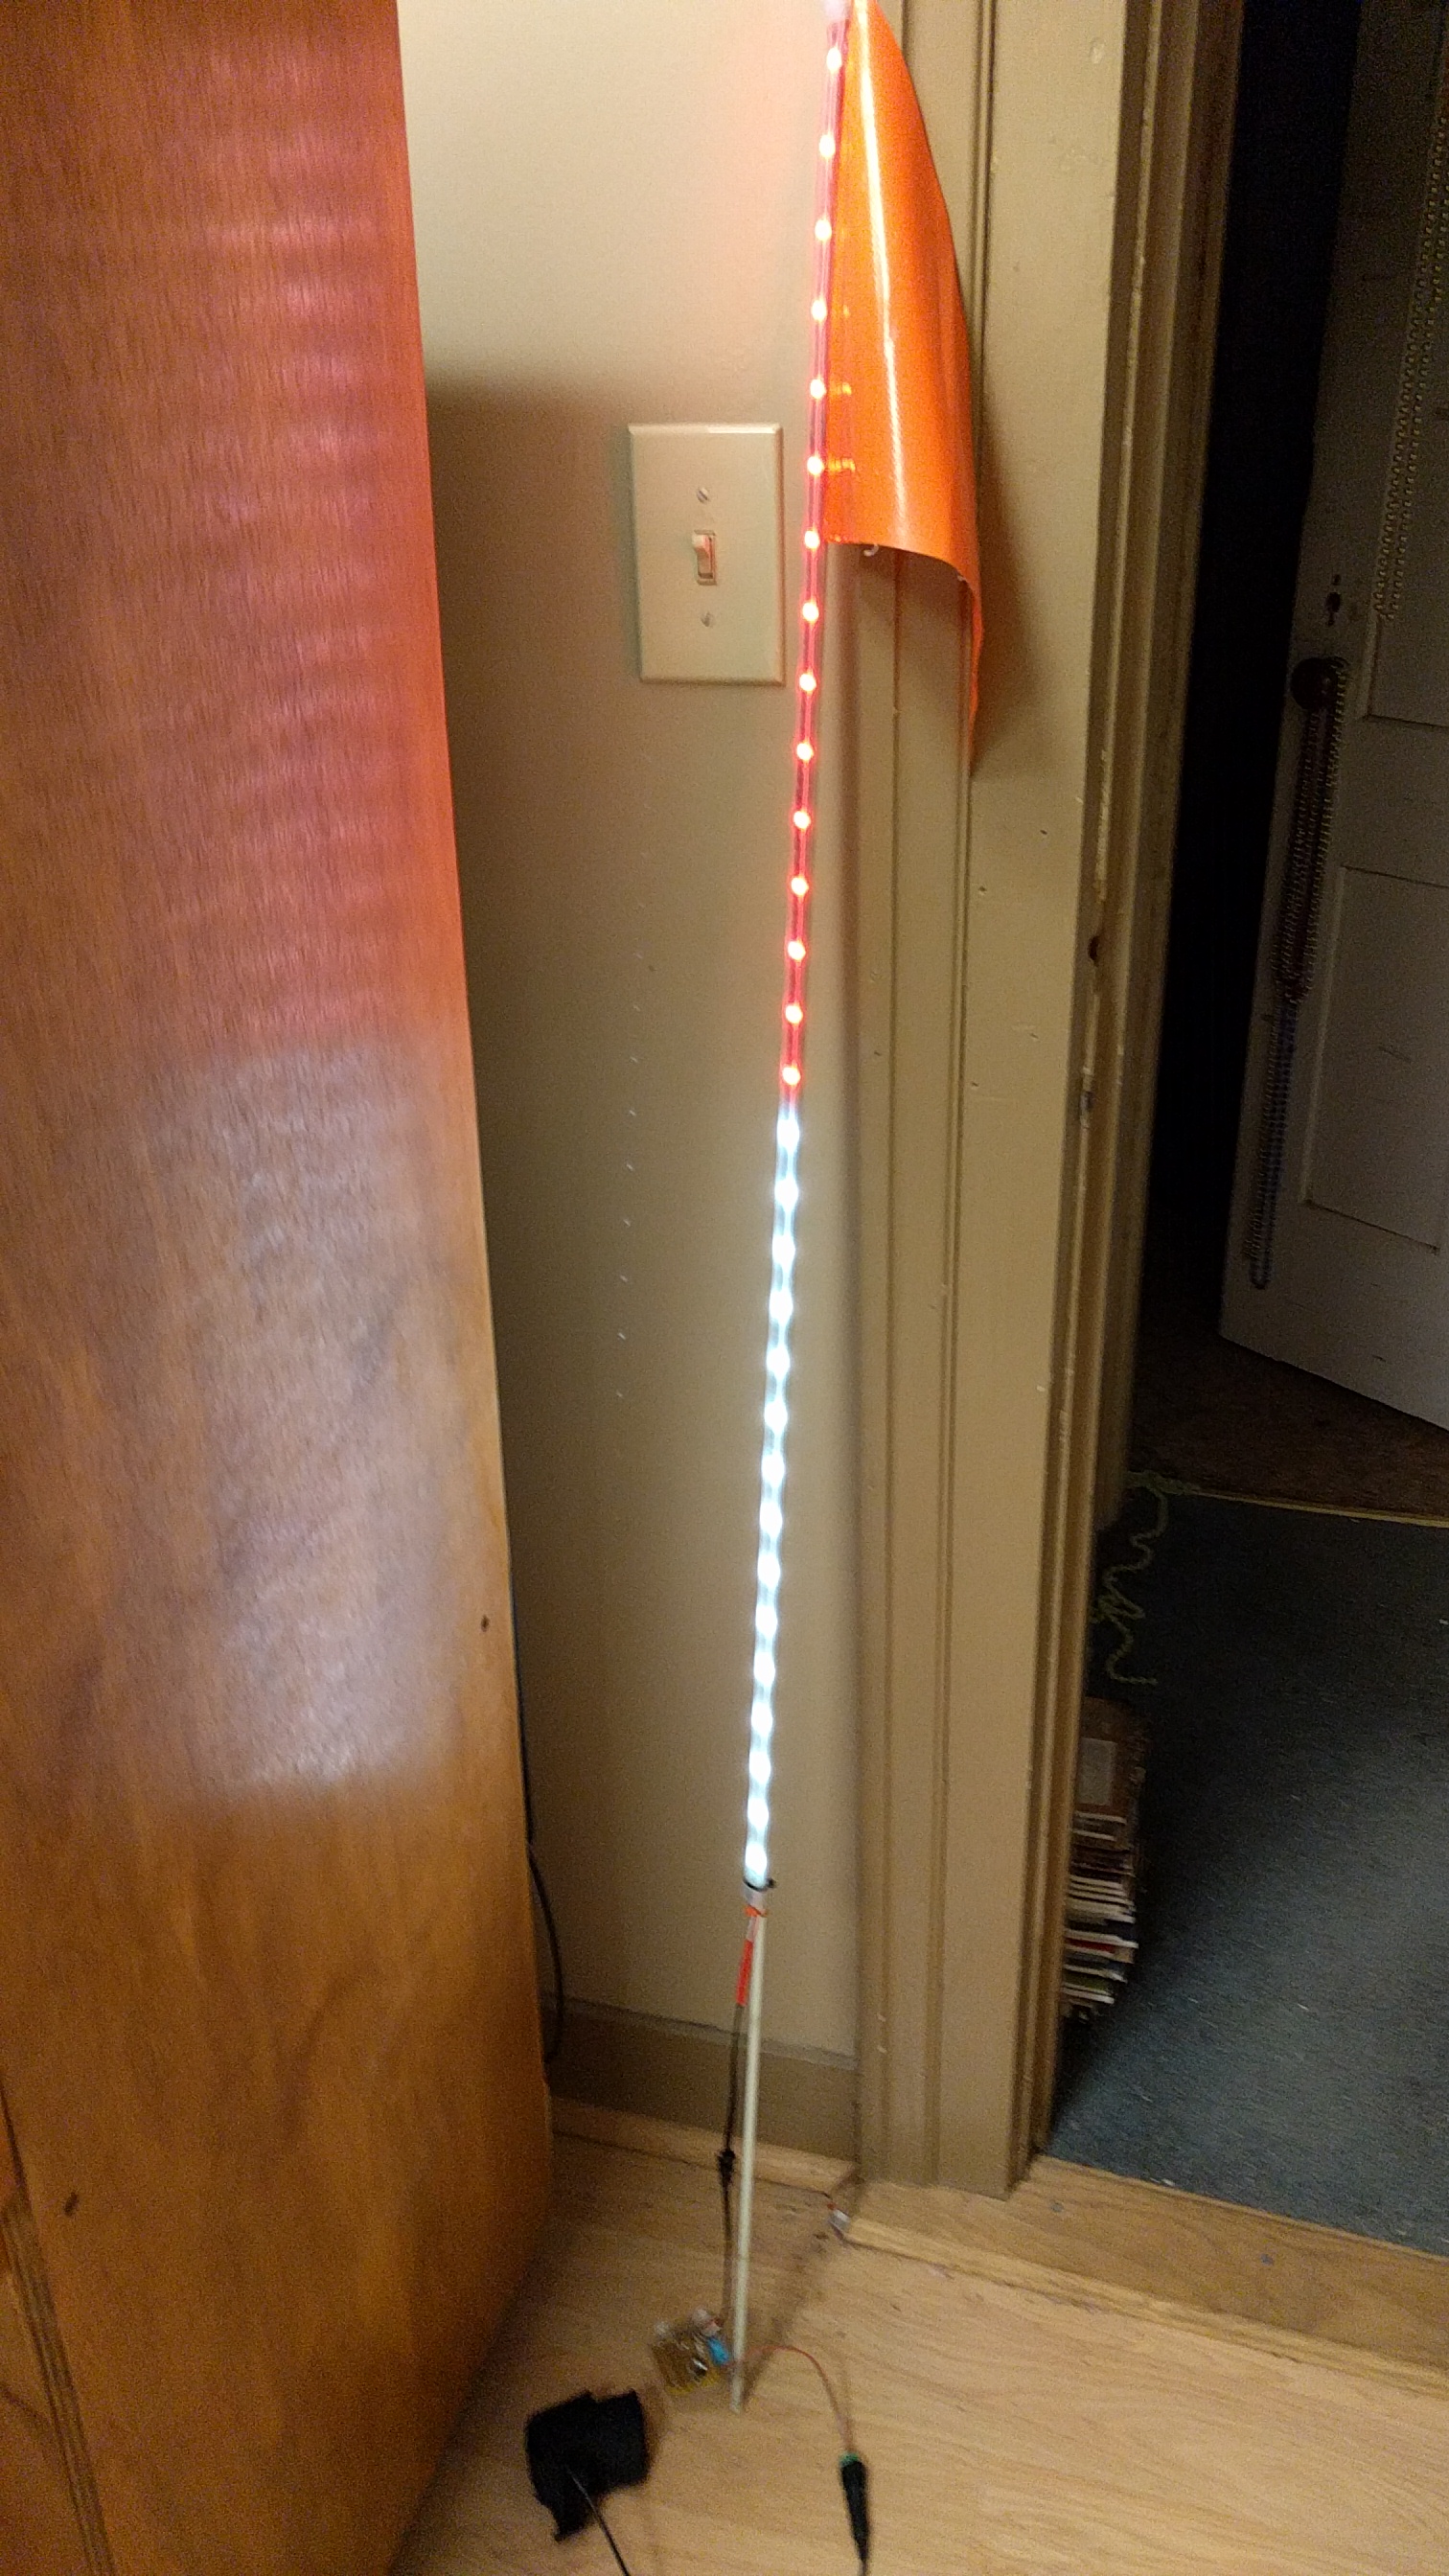
What’s a Pixel Pole? It’s an eye-catching bicycle flag pole covered in Neopixel LEDs that flash in a number of attention-grabbing patterns. It’s powered by a long-lasting Li-Ion rechargeable battery and it’s brains are a miniature Arduino microprocessor.
An early prototype
Some of the parts are available singly, while others, because of various shipping and sourcing requirements, not to mention tiny size, can only be bought in bulk. I originally was concerned about the flagpole, both in receiving and shipping the finished project, but have decided to leave that out and let the purchaser locate their own. Attaching the lights to the pole is easy. It just takes a little silicone caulk – or similar clear, flexible adhesive – and a spot to lay it down long enough to attach it and let it cure.
Flag pole is not included. So that will make it easier to ship, and also let you use it in other ways on your bike.
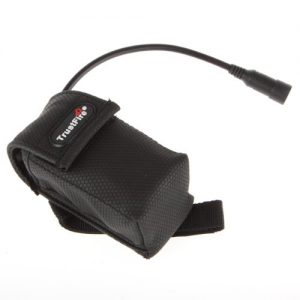
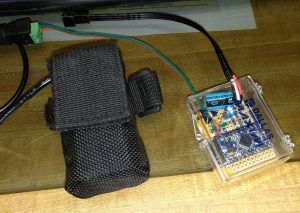
Typical battery pack
Great news! I have been able to reduce the costs of things and have found an economical source for the battery pack, so I can now include a battery pack, a cloth holder that straps onto your bike, and a charger! This is an introductory offer, and I don’t know how long I will be able to get this deal on the batteries, so it’s only for the early birds!
The other thing that you will need to supply on your own is the battery pack. You might have one you can use already. If not they are easy to find on EBay and Amazon. They are the same packs that are used for many bicycle headlamps of the “Magic Shine” or “Trust Fire” style. I had two left over because I had bought higher capacity packs for my headlights. These are ideal for this purpose; they come with a little case that lets you strap it to the bike frame, and they last many hours with the LED strip. Most of them also come with a charger, eliminating the need to buy that too. Examples of suitable battery packs are here and here and here.
How can I get one? I pulled the trigger and ordered enough parts for a trial run. If you would like to get one of the first batch, please watch this page for an announcement. I will let you know once the parts arrive and I can begin assembly.
We’re getting close. Parts have been coming in and I have begun assembling the pieces. Still waiting for some end caps for the strips and the battery packs. I had four Arduinos, so four modules have been built, but I’m waiting on more to arrive. The PC boards were ordered for 15 pieces and are on hand. They look great, but even with building the first four units, I have refinements for the next batch of boards.
Looking at the cost of parts (I’ve shopped around for good deals as much as possible) and the labor involved, this is not going to be cheap, but it’s not going to be an arm and a leg, or your favorite DiNotte, either. It looks like $60 is a doable price point.
So what will you get?
- 1 Meter of enclosed, weather resistant, LED strip with a connector at one end. It has 30 RGB colored LEDs and is the perfect length for a bike flag.
- An electronics module that the LED strip plugs into. The small connector fits only one way and locks securely together. There is also a plug to match the 8.4v LiIon battery pack.
- An 8.4v LiIon rechargeable battery pack with canvas case that can be strapped to your bike, and it’s charger.
It’s that simple. You just attach the strip of LEDs to the module and plug in the battery.
To attach the LED strip to your flag pole, you will need some clear silicone seal or adhesive. You will find it in any hardware store. Get the smallest tube you can find, because it doesn’t take much. Lay the strip out, face down, on a table or work bench. You’ll need to let it set up there for at least a couple hours. Put a small bead of the sealant on the back of the strip for the entire length. Place your flag pole onto the adhesive carefully. Start with one end and line it up as you press it down. The silicone adhesive will ooze out on each side of the pole. Using your finger, smooth the adhesive so that it meets the strip and pole junction smoothly. Wetting you finger first with water helps. You can clamp the pole down onto the strip with small carpenters clamps, or place some weight on it (books, magazines work fine.) Give it time to cure – 1-2 hours – before you move it. You can put it away someplace else then, but let it cure completely overnight before you install it on your bike. I recommend putting a small nylon wire tie around the ends of the strip to hold them to the pole. This provides extra strain relief at the stress points where the adhesive could be pulled away from the pole. I also added one to hold the wires as well.
Alternatively, you could just put a wire tie every six inches or so.
Should the strip ever start to come off, or you miss a spot, just apply some more silicone adhesive. Using it with a flag or without is your choice. I put it on right over the orange plastic flag on mine. It actually helps keep the flag on. I think if I were doing it again, I’d take the flag off and just put some surveyors tape on it as a streamer. If you have a big, fancy flag you want to use, you will have to be creative with how you do it.
You also don’t need to put it on a flag pole. There are any number of ways it could be placed on your bike. Wire ties would be great for that. Most of the patterns are designed for a vertical orientation, though.
Crude, but works great. Newer versions are nicer.
The current program has two banks of LED patterns that play in random order. Each pattern runs for 30 seconds, then changes to another pattern. It’s very eye-catching, almost mesmerizing, and really gets attention. They are visible in daylight, but not so bright that they are noticeable in bright sun. Where they really shine (pun intended) is when it is overcast, when you ride through some shadows, and even more so at night.
The default bank of 15 patterns are all designed for bicycle safety. They are predominantly red, white, and a little blue thrown in for contrast.
A second bank of patterns, 22 at this time, includes all the first bank, plus some more colorful effects. Rainbows and more colors, such as yellows and greens are found. To change to the second bank, the cover of the module needs to be removed (two screws) and a jumper removed, or moved to the side. It’s just like a jumper in a computer – it just slides on or off some pins.
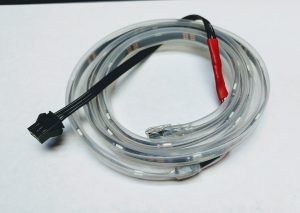 Neopixel strip |
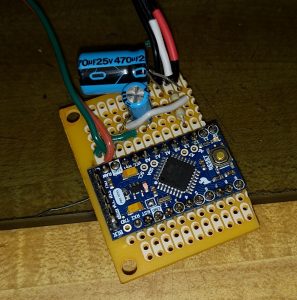
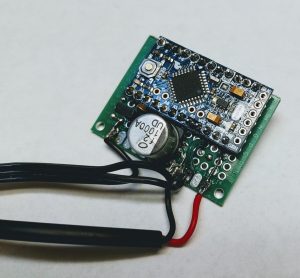 Prototype 2 circuit board |
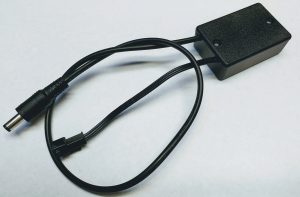 The module ready to go |

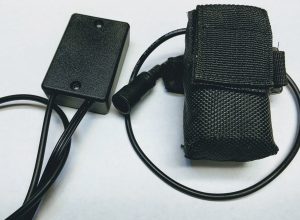
The battery is larger than the module.
Ordering: I am getting close to being ready to sell the first batch of Pixel Pole LEDs. As soon as all parts arrive and I can build some up, I will put the word out how to order them. I am working on a e-commerce site that will help with the fulfillment tasks.
Warranty: I promise to deliver to you a working LED light. If it arrives and does not function, send it back and I will replace it. However, this is not a commercial product, it is more like a craft, beyond that I cannot support it. I promise it will be working when you get it. After that, you need to take care of it. There is some risk of user damage to it from either moisture or incorrect voltage and polarity. Wiring on a bike can be fragile. You assume all risk for those things. The LED strip is moisture resistant and enclosed in a soft plastic that keeps water out, but the electronic module needs to be protected from moisture. Put it in a bag on your bike, or wrap it in a zip-lock bag if you can’t.
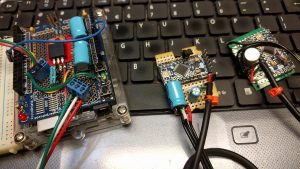
Evolution of the design
The evolution of the design. Several iterations of the circuit have been undergone. From left to right:
The first circuit was built on an Arduino Uno and a proto shield and was not even close to miniaturized. It became a platform for the programming and understanding how the neopixel LED strips work.
The second prototype was built on an old scrap of protoboard using a Arduino Pro Mini processor. It’s first housing was an old jewel box that some IC sample came in. It has since been transferred into the small plastic box that will be used from here on. A surface mount voltage regulator IC on the back of the board helped reduce size, but the big through-hole electrolytic capacitor is still a bit cumbersome. This prototype is still functioning on my Catrike.
The third prototype uses more surface mount parts including the capacitor. It is built on a double-sided proto board and I attempted to lay out the construction to approximate the layout that will be used with the PC boards. During the assembly of this, I refined the PC board layout quite a bit.
Troubleshooting:
It doesn’t work! – Be sure that your battery is good and is fully charged. Once it drops below a certain point, it just stops. No fade out or other warning. I have had 4-6 hours run time with the battery packs I have, but yours may be different. IMPORTANT! Be sure the polarity is correct! The center pin/hole of the plug is positive. The outer shell is negative. As far as I know, all of those sold as bike light batteries are wired that way. If there is any doubt about the polarity, or if you think your battery may not be working right or not charged, check it with a voltmeter. It should be about 8 volts and the center must be positive. Reversing the polarity will likely damage the device beyond repair.
How do I turn it on, or off? Simple, just plug the battery in to turn on, and unplug it to turn off. There is about a 3 second delay while it initializes itself and the light show begins. It is recommended that you do not unplug or plug in the LED strip while power is applied to the module.
How do I know when the battery is low? Simple, it stops working. It will stop before the level of the battery gets low enough to harm the battery. Use the charger that came with the battery to recharge it.
Can I make my own battery pack, or use some other type? Yes, you could. Unless you are very confident of your electrical abilities, I would not recommend it. But if you really want to here’s some information. The power plug on the module is a 5.5 x 2.1mm coaxial power connector. Very common, but so are other sizes. They all look alike, so be sure of those numbers. The center pin is positive. The outer shell is negative. That is very important. Any power source from 6v to 12v DC will work. Do not exceed 12V. When all LEDs are on at once, especially white, it probably draws over 1.5A. You could use a NiMh pack, or a cordless drill battery. I would not recommend alkaline batteries. I have run mine with a USB power pack, but the problem with that is, it can be erratic. Both the Arduino processor and the Neopixels operate at 5v, which is all USB supplies. The module needs a little more for it’s regulators to work. Like I said, it worked for me, but it would stop working unexpectedly, but worked again if I unplugged it and plugged it back in. All in all, it’s probably easier and safer to use one of the battery packs I specified.


Oh la la! is all I can say. Can a person order a set? I work for Easy Street Recumbents in Austin, TX. We are always looking for improved lights and lighting systems for our customers. Please keep us informed!
Hi Rebecca,
I am waiting on just a few more parts to arrive to finish the first batch of pixelpoles. I will then have them for sale on Tindie.
I am selling them as sort of a hobby level product, like someone selling crafts. I can’t and don’t want to become a manufacturer. so they will only be available direct to the customer individually.
I’ve heard good things about Easy Street Recumbents, even up here in NY. If I ever get to Austin, I’ll stop by and say hello!